在前一篇文章《在Kubernetes中创建NFS类型的StorageClass》中,我们创建了一个StorageClass用于动态为PVC创建PV;
这篇文章我们会用这个StorageClass,来部署Zookeeper和Kafka;
<br/>
<!--more-->本次部署会使用到 bitnami 提供的 Helm Chart 直接进行安装;
可以参考的文章:
首先,会部署一个3节点Zookeeper集群,并通过NodePort对外暴露服务;
然后,会再部署 3节点 Kafka 集群,使用上面我们部署的 Zookeeper 来存储元数据,而不再单独创建;
注:还没有创建 StorageClass 的需要先看这篇文章《在Kubernetes中创建NFS类型的StorageClass》创建!
<br/>
关于 Helm 的安装,配置,这里就不再赘述了,可以参考官方文档:
Helm 安装之后还需要添加 bitnami 的 repo:
helm repo add bitnami https://charts.bitnami.com/bitnami

helm repo update
查看:
root@ubuntu-1:~# helm repo list

NAME    URL
stable  http://mirror.azure.cn/kubernetes/charts/
bitnami https://charts.bitnami.com/bitnami
<br/>
bitnami 官方文档:
使用 helm 部署 zookeeper 集群非常简单,通过下面一条命令即可:
helm install zookeeper bitnami/zookeeper \
  --namespace workspace --create-namespace \
  --set replicaCount=3 \
  --set service.type=NodePort \
  --set service.nodePorts.client="32181" \
  --set global.storageClass=my-storage
参数说明:
--namespace workspace:部署的 namespace 为 workspace,可自行修改;--create-namespace:如果 namespace 不存在则创建;--set replicaCount=3:创建的 Zookeeper 有三个副本,即三节点;--set service.type=NodePort:服务暴露方式为 NodePort--set service.nodePorts.client="32181":对外 NodePort 的端口为 32181--set global.storageClass=my-storage:ZK 使用的存储为上一篇文章中创建的 StorageClass;更多参数说明:
执行后输出如下:
NAME: zookeeper
LAST DEPLOYED: Fri Dec 15 11:42:36 2023
NAMESPACE: workspace
STATUS: deployed
REVISION: 1
TEST SUITE: None
NOTES:
CHART NAME: zookeeper
CHART VERSION: 12.3.4
APP VERSION: 3.9.1

** Please be patient while the chart is being deployed **

ZooKeeper can be accessed via port 2181 on the following DNS name from within your cluster:

    zookeeper.workspace.svc.cluster.local

To connect to your ZooKeeper server run the following commands:

    export POD_NAME=$(kubectl get pods --namespace workspace -l "app.kubernetes.io/name=zookeeper,app.kubernetes.io/instance=zookeeper,app.kubernetes.io/component=zookeeper" -o jsonpath="{.items[0].metadata.name}")
    kubectl exec -it $POD_NAME -- zkCli.sh

To connect to your ZooKeeper server from outside the cluster execute the following commands:

    export NODE_IP=$(kubectl get nodes --namespace workspace -o jsonpath="{.items[0].status.addresses[0].address}")
    export NODE_PORT=$(kubectl get --namespace workspace -o jsonpath="{.spec.ports[0].nodePort}" services zookeeper)
    zkCli.sh $NODE_IP:$NODE_PORT
提示了 ZK 版本,以及连接到 ZK Pod 的几种方式;
<font color="#f00">**注意:` zookeeper.workspace.svc.cluster.local`,这是 Zookeeper 服务在集群中的服务名,后面 Kafka 在连接时会用到!**</font>
<br/>
查看部署成功:
root@ubuntu-1:~# kubectl get po -n workspace
NAME          READY   STATUS    RESTARTS   AGE
zookeeper-0   1/1     Running   0          75s
zookeeper-1   1/1     Running   0          75s
zookeeper-2   1/1     Running   0          75s

root@ubuntu-1:~# k get svc -n workspace
NAME                 TYPE        CLUSTER-IP       EXTERNAL-IP   PORT(S)                                        AGE
zookeeper            NodePort    10.233.157.223   <none>        2181:32181/TCP,2888:32688/TCP,3888:32220/TCP   17s
zookeeper-headless   ClusterIP   None             <none>        2181/TCP,2888/TCP,3888/TCP                     17s

root@ubuntu-1:~# k get pvc -n workspace
NAME               STATUS   VOLUME                                     CAPACITY   ACCESS MODES   STORAGECLASS   AGE
data-zookeeper-0   Bound    pvc-fcc70d18-fc0b-4b56-bb1e-66181fbe598f   8Gi        RWO            my-storage     5m1s
data-zookeeper-1   Bound    pvc-80ca6167-2f9d-48c6-ad6c-82549e713250   8Gi        RWO            my-storage     5m1s
data-zookeeper-2   Bound    pvc-c9c32d8d-9c21-4473-9d18-48b8b7b9edd7   8Gi        RWO            my-storage     5m1s
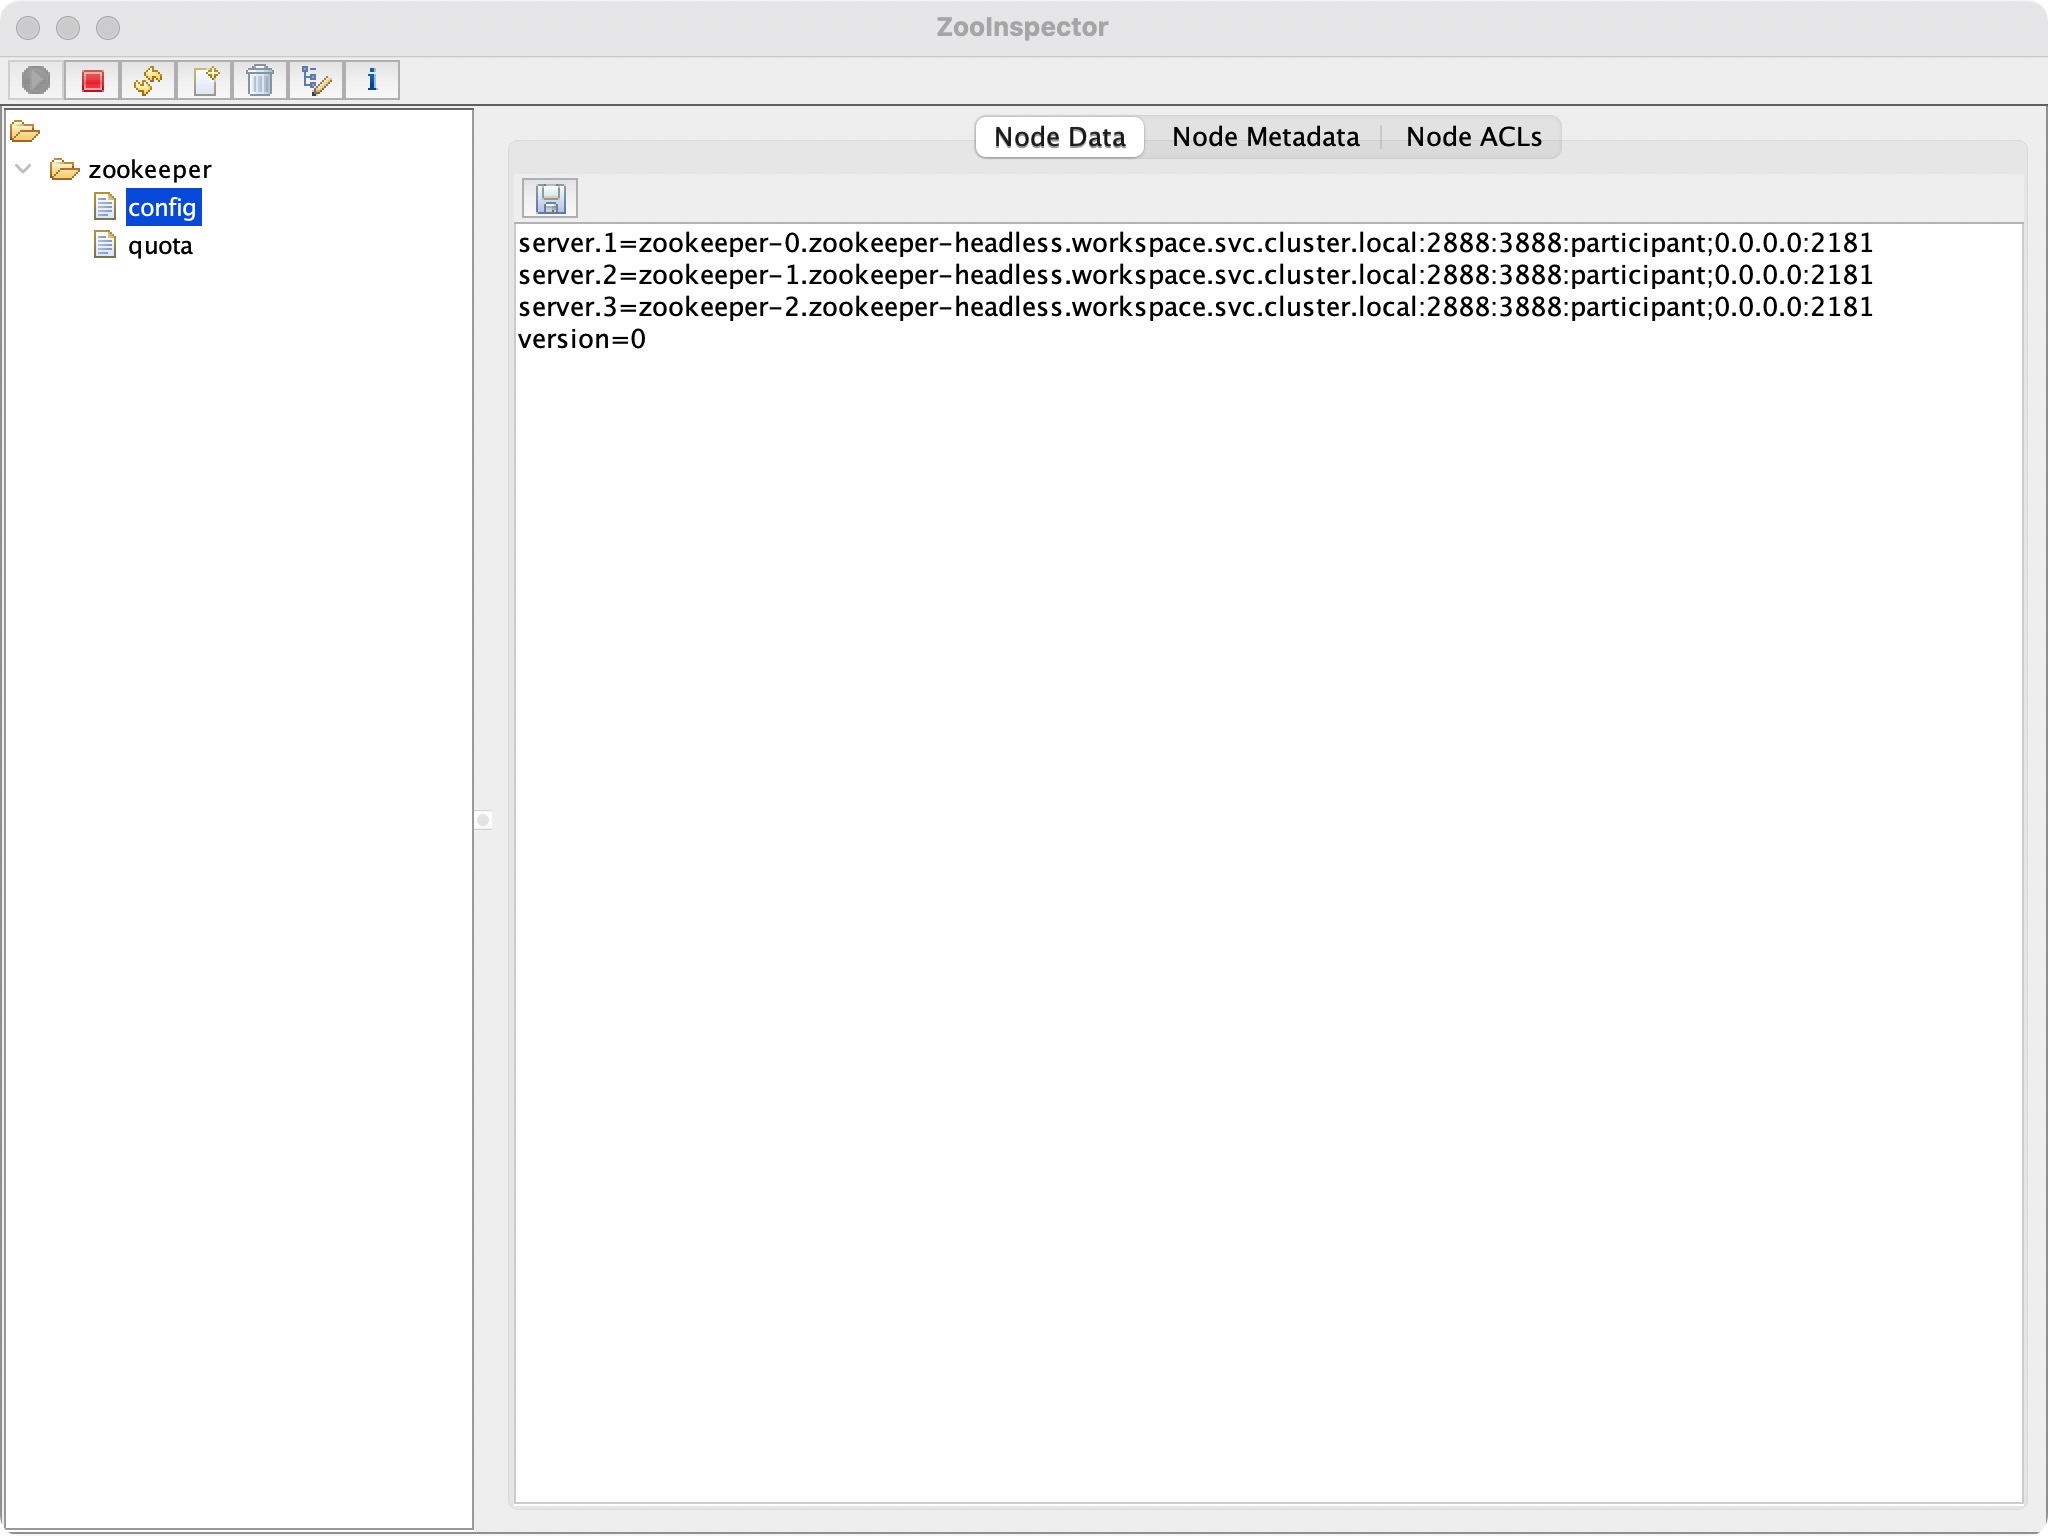
可以看到,我们已经通过 NodePort 暴露了 Client 连接端口;
直接在本地连接即可,这里使用 Zookeeper 官方提供的 ZooInspector:
连接集群中哪个 Node 均可!

也可以使用代码连接~
至此,Zookeeper 集群就部署完成了!
<br/>
在上面成功部署了 Zookeeper 的基础之上,我们继续部署 Kafka 集群:
export ZOOKEEPER_SERVICE_NAME='zookeeper.workspace.svc.cluster.local'

# kafka
helm install kafka bitnami/kafka \
  --namespace workspace --create-namespace \
  --set global.storageClass=my-storage \
  --set broker.replicaCount=3 \
  --set controller.replicaCount=0 \
  --set zookeeper.enabled=false \
  --set kraft.enabled=false \
  --set externalZookeeper.servers=${ZOOKEEPER_SERVICE_NAME} \
  --set externalAccess.enabled=true \
  --set externalAccess.broker.service.type=NodePort \
  --set externalAccess.broker.service.nodePorts[0]=30092 \
  --set externalAccess.broker.service.nodePorts[1]=30093 \
  --set externalAccess.broker.service.nodePorts[2]=30094 \
  --set externalAccess.autoDiscovery.enabled=true \
  --set serviceAccount.create=true \
  --set rbac.create=true
参数说明:
--namespace workspace:部署的 namespace 为 workspace,可自行修改;--create-namespace:如果 namespace 不存在则创建;--set global.storageClass=my-storage:Kafka 使用的存储为上一篇文章中创建的 StorageClass;--set broker.replicaCount=3:kafka Broker 的副本数为 3;--set controller.replicaCount=0:不再创建 controller 而是使用我们之前已经创建的 Zookeeper 作为 Controller;--set zookeeper.enabled=false:不再创建 Zookeeper 而是使用我们之前已经创建的 Zookeeper;--set kraft.enabled=false:不使用 kraft 模式部署 Kafka(高版本的 Kafka 已不再使用 Zookeeper存储元数据,而是使用 Raft 协议将元数据存储在各个 Kafka 节点上);--set externalZookeeper.servers=${ZOOKEEPER_SERVICE_NAME}:声明使用我们已经部署的 Zookeeper,这里提供的是集群服务名;--set externalAccess.enabled=true:允许外部访问;--set externalAccess.broker.service.type=NodePort:使用 NodePort 暴露 Broker 的服务;--set externalAccess.broker.service.nodePorts[i]=x:设置第 i 个节点的端口号为x(对应external服务的端口号);--set externalAccess.autoDiscovery.enabled=true:允许服务自动发现;--set serviceAccount.create=true: k8s 集群外访问的 kafka-<0|1|2>-external 服务对应帐号;--set rbac.create=true: k8s 集群外访问的 kafka-<0|1|2>-external 服务对应 RBAC;更多参数见官方文档:
执行后输出:
NAME: kafka
LAST DEPLOYED: Fri Dec 15 12:25:26 2023
NAMESPACE: workspace
STATUS: deployed
REVISION: 1
TEST SUITE: None
NOTES:
CHART NAME: kafka
CHART VERSION: 26.5.0
APP VERSION: 3.6.1

** Please be patient while the chart is being deployed **

Kafka can be accessed by consumers via port 9092 on the following DNS name from within your cluster:

    kafka.workspace.svc.cluster.local

Each Kafka broker can be accessed by producers via port 9092 on the following DNS name(s) from within your cluster:

    kafka-broker-0.kafka-broker-headless.workspace.svc.cluster.local:9092
    kafka-broker-1.kafka-broker-headless.workspace.svc.cluster.local:9092
    kafka-broker-2.kafka-broker-headless.workspace.svc.cluster.local:9092

The CLIENT listener for Kafka client connections from within your cluster have been configured with the following security settings:
    - SASL authentication

To connect a client to your Kafka, you need to create the 'client.properties' configuration files with the content below:

security.protocol=SASL_PLAINTEXT
sasl.mechanism=SCRAM-SHA-256
sasl.jaas.config=org.apache.kafka.common.security.scram.ScramLoginModule required \
    username="user1" \
    password="$(kubectl get secret kafka-user-passwords --namespace workspace -o jsonpath='{.data.client-passwords}' | base64 -d | cut -d , -f 1)";

To create a pod that you can use as a Kafka client run the following commands:

    kubectl run kafka-client --restart='Never' --image docker.io/bitnami/kafka:3.6.1-debian-11-r0 --namespace workspace --command -- sleep infinity
    kubectl cp --namespace workspace /path/to/client.properties kafka-client:/tmp/client.properties
    kubectl exec --tty -i kafka-client --namespace workspace -- bash

    PRODUCER:
        kafka-console-producer.sh \
            --producer.config /tmp/client.properties \
            --broker-list kafka-broker-0.kafka-broker-headless.workspace.svc.cluster.local:9092,kafka-broker-1.kafka-broker-headless.workspace.svc.cluster.local:9092,kafka-broker-2.kafka-broker-headless.workspace.svc.cluster.local:9092 \
            --topic test

    CONSUMER:
        kafka-console-consumer.sh \
            --consumer.config /tmp/client.properties \
            --bootstrap-server kafka.workspace.svc.cluster.local:9092 \
            --topic test \
            --from-beginning
To connect to your Kafka nodes from outside the cluster, follow these instructions:
    NOTE: It may take a few minutes for the LoadBalancer IPs to be available.

        Watch the status with: 'kubectl get svc --namespace workspace -l "app.kubernetes.io/name=kafka,app.kubernetes.io/instance=kafka,app.kubernetes.io/component=kafka,pod" -w'

    Kafka Brokers domain: You will have a different external IP for each Kafka broker. You can get the list of external IPs using the command below:

        echo "$(kubectl get svc --namespace workspace -l "app.kubernetes.io/name=kafka,app.kubernetes.io/instance=kafka,app.kubernetes.io/component=kafka,pod" -o jsonpath='{.items[*].status.loadBalancer.ingress[0].ip}' | tr ' ' '\n')"

    Kafka Brokers port: 9094
To connect to your Kafka broker nodes from outside the cluster, follow these instructions:
    Kafka brokers domain: You can get the external node IP from the Kafka configuration file with the following commands (Check the EXTERNAL listener)

        1. Obtain the pod name:

        kubectl get pods --namespace workspace -l "app.kubernetes.io/name=kafka,app.kubernetes.io/instance=kafka,app.kubernetes.io/component=kafka"

        2. Obtain pod configuration:

        kubectl exec -it KAFKA_POD -- cat /opt/bitnami/kafka/config/server.properties | grep advertised.listeners
    Kafka brokers port: You will have a different node port for each Kafka broker. You can get the list of configured node ports using the command below:

        echo "$(kubectl get svc --namespace workspace -l "app.kubernetes.io/name=kafka,app.kubernetes.io/instance=kafka,app.kubernetes.io/component=kafka,pod" -o jsonpath='{.items[*].spec.ports[0].nodePort}' | tr ' ' '\n')"

The EXTERNAL listener for Kafka client connections from within your cluster have been configured with the following settings:
    - SASL authentication

To connect a client to your Kafka, you need to create the 'client.properties' configuration files with the content below:

security.protocol=SASL_PLAINTEXT
sasl.mechanism=SCRAM-SHA-256
sasl.jaas.config=org.apache.kafka.common.security.scram.ScramLoginModule required \
    username="user1" \
    password="$(kubectl get secret kafka-user-passwords --namespace workspace -o jsonpath='{.data.client-passwords}' | base64 -d | cut -d , -f 1)";
提供了多种连接 Kafka 集群中服务的方式,尤其要注意的是,我们部署的 Kafka 会使用 SASL 进行身份验证;
默认的username:user1
默认的password:存储在 K8S 的 secret 中,根据提示,可以通过下面的命令获取:
kubectl get secret kafka-user-passwords --namespace workspace -o jsonpath='{.data.client-passwords}' | base64 -d | cut -d , -f 1

# g2Xltk19G0
<br/>
查看部署成功:
root@ubuntu-1:~# k get po -n workspace
NAME             READY   STATUS    RESTARTS   AGE
kafka-broker-0   1/1     Running   0          8m54s
kafka-broker-1   1/1     Running   0          8m54s
kafka-broker-2   1/1     Running   0          8m54s
zookeeper-0      1/1     Running   0          42m
zookeeper-1      1/1     Running   0          42m
zookeeper-2      1/1     Running   0          42m

root@ubuntu-1:~# k get svc -n workspace
NAME                      TYPE        CLUSTER-IP       EXTERNAL-IP   PORT(S)                                        AGE
kafka                     ClusterIP   10.233.56.148    <none>        9092/TCP,9095/TCP                              9m6s
kafka-broker-0-external   NodePort    10.233.117.223   <none>        9094:30092/TCP                                 9m7s
kafka-broker-1-external   NodePort    10.233.12.255    <none>        9094:30093/TCP                                 9m7s
kafka-broker-2-external   NodePort    10.233.187.124   <none>        9094:30094/TCP                                 9m7s
kafka-broker-headless     ClusterIP   None             <none>        9094/TCP,9092/TCP                              9m6s
zookeeper                 NodePort    10.233.157.223   <none>        2181:32181/TCP,2888:32688/TCP,3888:32220/TCP   42m
zookeeper-headless        ClusterIP   None             <none>        2181/TCP,2888/TCP,3888/TCP                     42m

root@ubuntu-1:~# k get pvc -n workspace
NAME                  STATUS   VOLUME                                     CAPACITY   ACCESS MODES   STORAGECLASS   AGE
data-kafka-broker-0   Bound    pvc-38d3502c-638c-433d-949f-8d2a9780322b   8Gi        RWO            my-storage     9m22s
data-kafka-broker-1   Bound    pvc-16ab6844-be99-448b-8147-2dac1f74eeab   8Gi        RWO            my-storage     9m22s
data-kafka-broker-2   Bound    pvc-301855a2-a0ca-4b0b-816a-adbb1422446b   8Gi        RWO            my-storage     9m22s
data-zookeeper-0      Bound    pvc-fcc70d18-fc0b-4b56-bb1e-66181fbe598f   8Gi        RWO            my-storage     42m
data-zookeeper-1      Bound    pvc-80ca6167-2f9d-48c6-ad6c-82549e713250   8Gi        RWO            my-storage     42m
data-zookeeper-2      Bound    pvc-c9c32d8d-9c21-4473-9d18-48b8b7b9edd7   8Gi        RWO            my-storage     42m
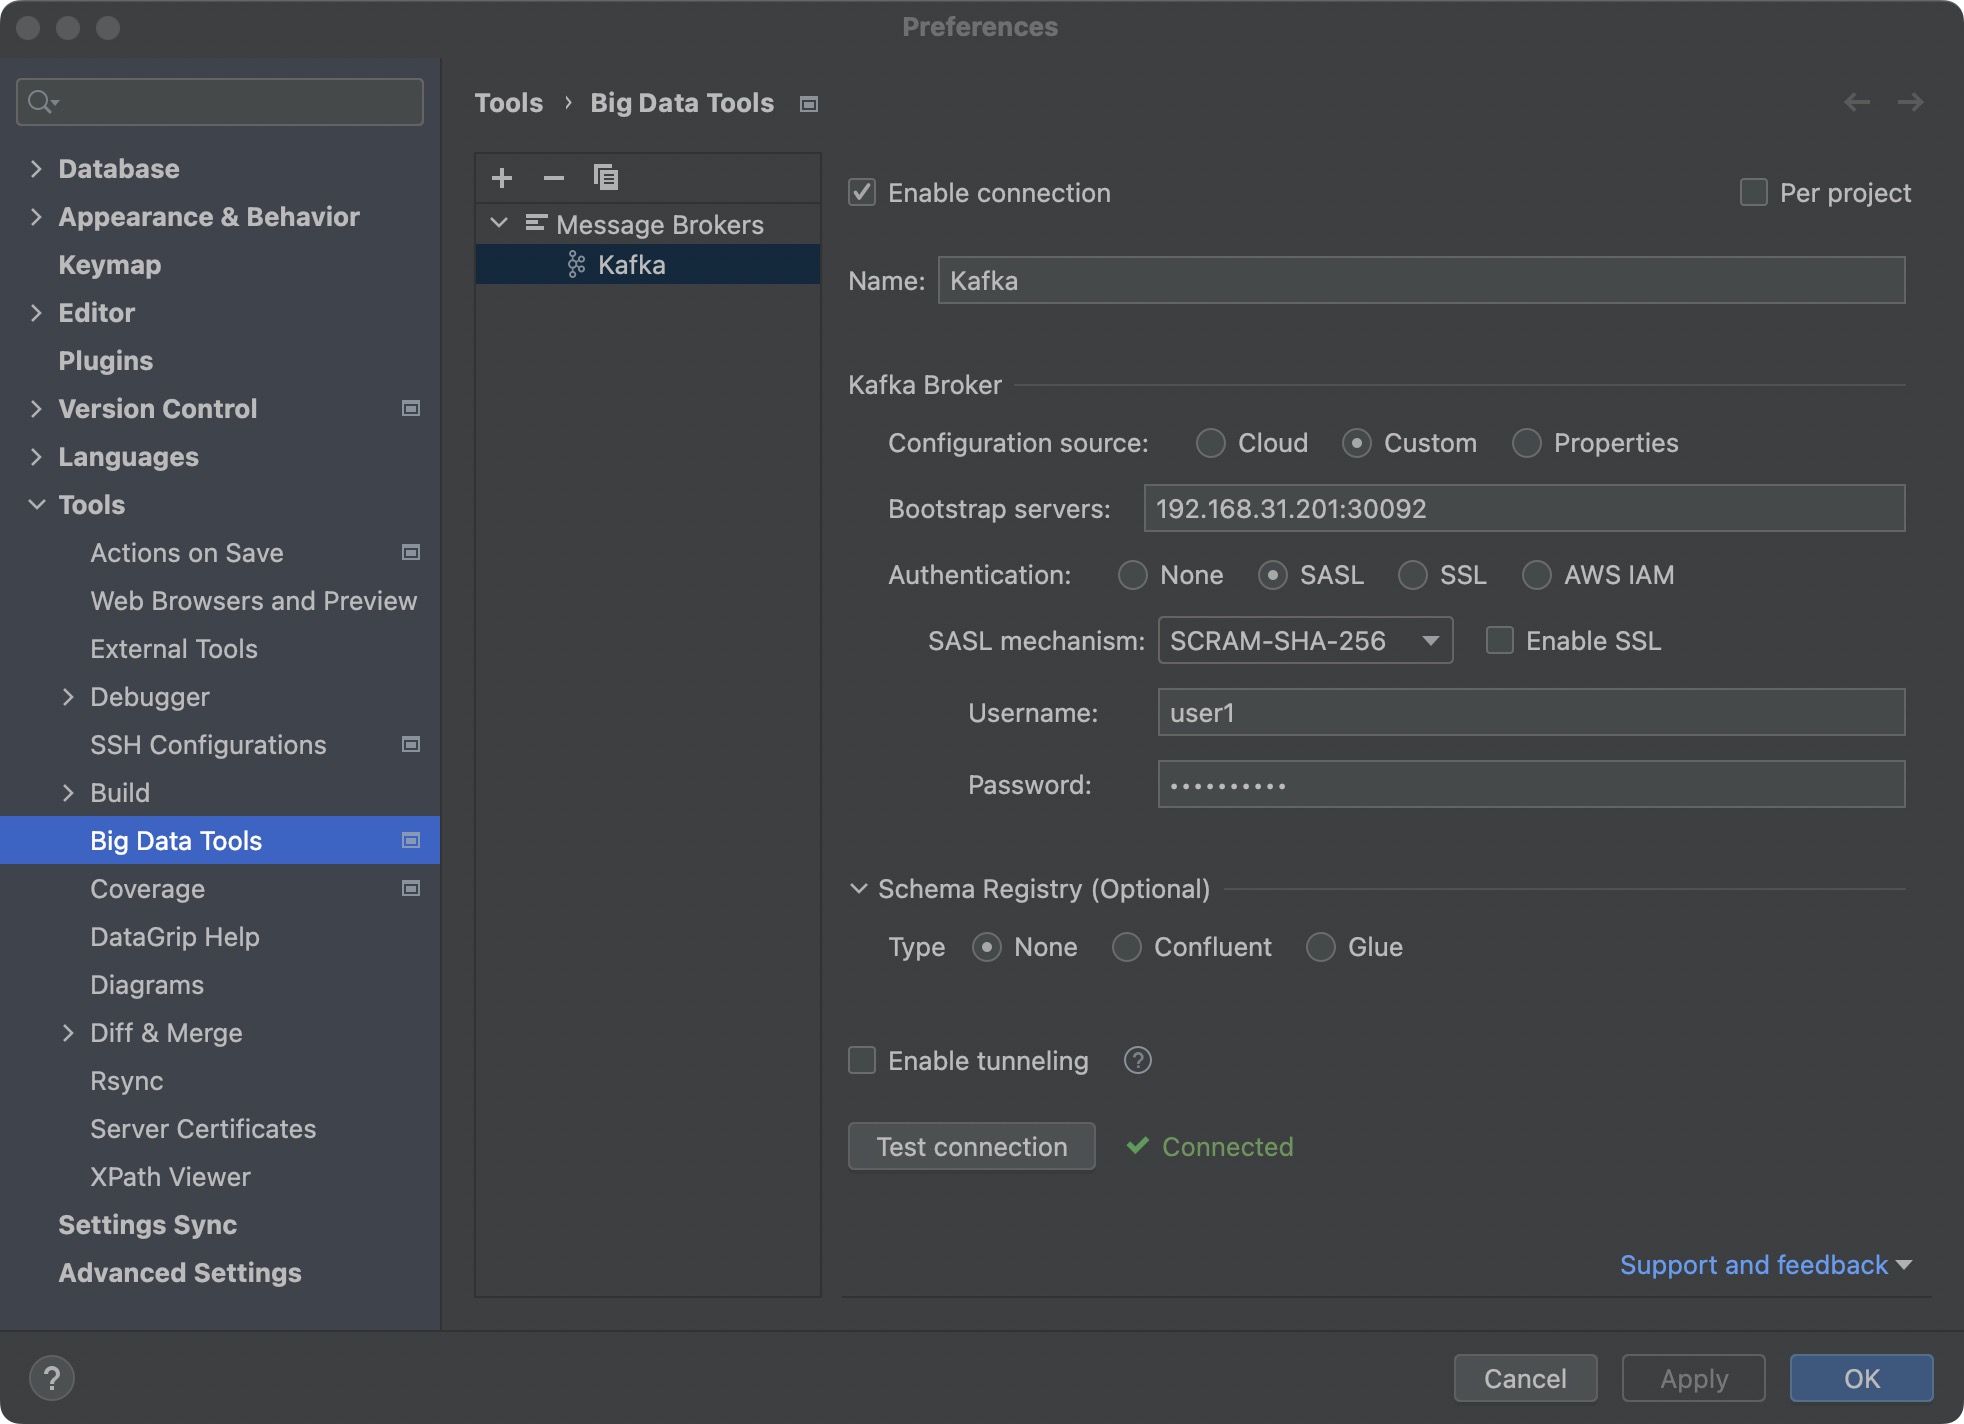
可以看到,服务已经成功部署,并且 kafka-broker-0-external、kafka-broker-1-external、kafka-broker-2-external 分别暴露在 30092、30093、30094 端口;
真正使用时,暴露一个端口,然后连接 K8S 集群任意一个 Node 的对应即可!
可以使用 DataGrip 中的 Kafka 插件来测试:

<br/>
在使用 bitnami 创建资源的时候,基本上都需要查看官方提供的文档:
同时,如果因为参数错误,报错无法部署,可以仔细查看报错的内容,也可以通过在这里找对应的检测逻辑来判断具体哪个参数有问题:
<br/>
bitnami 的某些参数为一个数组,例如:controller.extraContainerPorts;
如果是命令行输入,可以通过加空格的方式输入多个,例如:
--set controller.extraContainerPorts='30001 30002 30003'
<br/>
参考文章:
<br/>