最近看了下Electron,并且自己有下载微博图片的需求,就了解了一下免登录下载微博图片的方法,最后花了几个小时写了一个小工具;
源代码:
<br/>
<!--more-->本项目主要使用到的技术栈有:Electron + Vue、Node,前端UI使用了众所周知的ElementUI;
话不多说,接下来就开始吧!
<br/>
这里推荐使用
simulatedgreg/electron-vue模板创建项目;具体初始化项目可Google;
由于这个项目比较简单,我就没有使用这个模板初始化项目
首先我们使用vue初始化一个项目:
vue create weibo-pic-downloader
选择对应的组件之后,集成Electron;
使用下面的命令:
vue add vue-cli-plugin-electron-builder
并选择最新的版本安装;
这一步会下载electron的依赖文件 60M 左右;
此后,在src目录下会创建一个background.js文件,作为主进程;同时,package.json中会存在下面的一些命令:
"electron:build": "vue-cli-service electron:build",
"electron:serve": "vue-cli-service electron:serve",
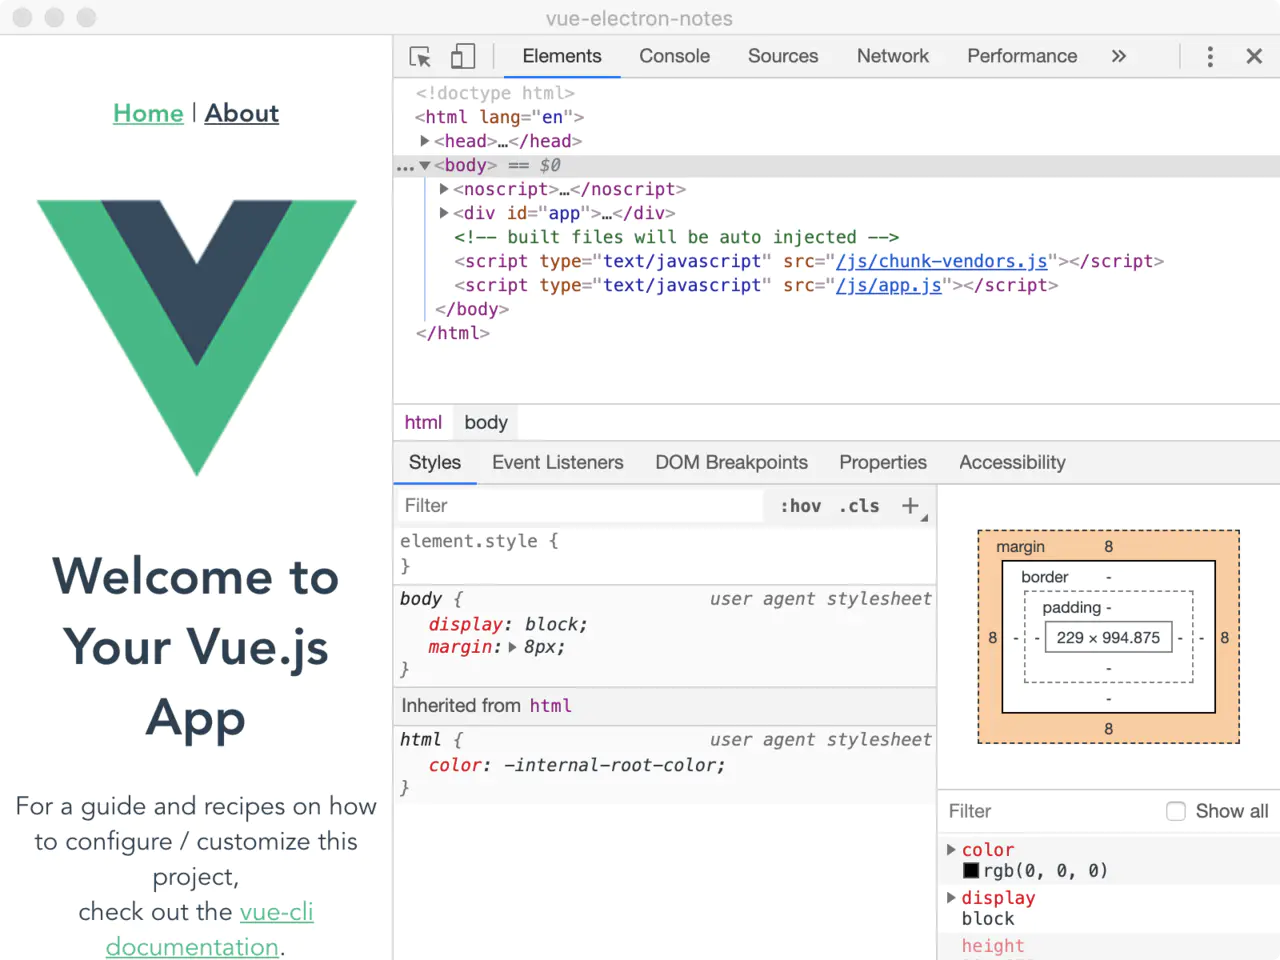
我们使用yarn electron:serve或者npm run electron:serve即可启动;
启动之后如下:
至此,我们的开发环境和初始化项目完成!
此时的目录结构类似于下面:
$ tree
.
├─node_modules
├─public
├─package.json
└─src
    ├─background.js
    ├─main.js
    ├─assets
        ├─...
    └─components
        ├─...
package.json中的内容如下所示:
{
  "name": "weibo-pic-downloader",
  "version": "0.1.0",
  "private": true,
  "scripts": {
    "serve": "vue-cli-service serve",
    "build": "vue-cli-service build",
    "lint": "vue-cli-service lint",
    "electron:build": "vue-cli-service electron:build",
    "electron:serve": "vue-cli-service electron:serve",
    "postinstall": "electron-builder install-app-deps",
    "postuninstall": "electron-builder install-app-deps"
  },
  "main": "background.js",
  "dependencies": {
    "element-ui": "^2.14.0",
    "request": "^2.88.2",
    "vue": "^2.6.11"
  },
  "devDependencies": {
    "@vue/cli-plugin-eslint": "~4.5.0",
    "@vue/cli-service": "~4.5.0",
    "electron": "^9.0.0",
    "electron-devtools-installer": "^3.1.0",
    "eslint": "^6.7.2",
    "eslint-plugin-vue": "^6.2.2",
    "vue-cli-plugin-electron-builder": "~2.0.0-rc.5",
    "vue-template-compiler": "^2.6.11"
  },
  "description": "A no-login tool to download picture from Weibo",
  "author": {
    "name": "jasonkay",
    "email": "jasonkayzk@gmail.com",
    "url": "https://jasonkayzk.github.io/"
  }
}
可以看到,入口文件由main.js改为了background.js!
此时:
- main.js为渲染进程的入口;
- background.js为主进程的入口;
<br/>
在编写主进程和渲染进程之前,还是要说一下,Electron是基于Chromium实现的(相当于打开应用时打开了一个Chrome浏览器),而Chromium是基于多进程实现的,所以我们的主进程和渲染进程是在不同的进程中存在的!
而为了让主进程和渲染进程能够相互通信,就要使用IPC这种进程间通信的方法:
主进程和渲染进程分别通过注册/响应对应的事件来完成配合,这也是Electron的核心所在;
在了解了Electron的运行模式后,我们开始开发这个简单的应用吧!
经过一番调研,我发现微博手机版可以免登录查看几乎所有的博文,同时通过下面的链接我们可以很轻易的获取到当前页的json数据:
https://m.weibo.cn/api/container/getIndex?count=25&page=<pageIndex>&containerid=<containerid>
其中包括了containerid对应用户发布的文章内容、日期、图片甚至是视频的地址;
所以通过遍历pageIndex即可取到当前用户全部的博文,即可取到图片;
那么这个containerid怎么计算呢?很简单!
对于微博中某个ID来说,containerid就是"107603" + uid!
至于为什么选择107603,原因我也不清楚;
至于uid,通过查看网页源代码搜索uid即可:
https://jingyan.baidu.com/article/67662997970f6c54d51b8402.html
这里不再赘述;
既然链接可以取到,那么这个爬虫就不难了!
下面是一个示例的json:
{
"ok": 1,
"data": {
"cardlistInfo": {
"containerid": "1076036404087010",
"v_p": 42,
"show_style": 1,
"total": 2264,
"since_id": 4561408349971090
},
"cards": [{
"card_type": 9,
"itemid": "1076036404087010_-_4497263844203901",
"scheme": "https://m.weibo.cn/status/IEOhahDCR?mblogid=IEOhahDCR&luicode=10000011&lfid=1076036404087010",
"mblog": {
"visible": {
"type": 0,
"list_id": 0
},
"created_at": "04-24",
"id": "4497263844203901",
"idstr": "4497263844203901",
"mid": "4497263844203901",
"can_edit": false,
"show_additional_indication": 0,
"text": "在私信里收到的投稿 <br />泡芙已经被网友魔改成这样了吗 =͟͟͞͞(●⁰ꈊ⁰● |||)<br />你们有见过吗<span class=\"url-icon\"><img alt=[允悲] src=\"https://h5.sinaimg.cn/m/emoticon/icon/default/d_yunbei-a14a649db8.png\" style=\"width:1em; height:1em;\" /></span><br />还有一个揣手手的找不到了<span class=\"url-icon\"><img alt=[允悲] src=\"https://h5.sinaimg.cn/m/emoticon/icon/default/d_yunbei-a14a649db8.png\" style=\"width:1em; height:1em;\" /></span><span class=\"url-icon\"><img alt=[允悲] src=\"https://h5.sinaimg.cn/m/emoticon/icon/default/d_yunbei-a14a649db8.png\" style=\"width:1em; height:1em;\" /></span><span class=\"url-icon\"><img alt=[允悲] src=\"https://h5.sinaimg.cn/m/emoticon/icon/default/d_yunbei-a14a649db8.png\" style=\"width:1em; height:1em;\" /></span> ",
"textLength": 136,
"source": "大眼萌妹小泡芙超话",
"favorited": false,
"pic_types": "0,0,0,0,0,0,0,0,0",
"thumbnail_pic": "http://wx3.sinaimg.cn/thumbnail/006ZoTzYgy1ge4wf88lyoj306o06owfd.jpg",
"bmiddle_pic": "http://wx3.sinaimg.cn/bmiddle/006ZoTzYgy1ge4wf88lyoj306o06owfd.jpg",
"original_pic": "http://wx3.sinaimg.cn/large/006ZoTzYgy1ge4wf88lyoj306o06owfd.jpg",
"is_paid": false,
"mblog_vip_type": 0,
"user": {
"id": 6404087010,
"screen_name": "香香软软的小泡芙",
"profile_image_url": "https://tvax3.sinaimg.cn/crop.0.0.512.512.180/006ZoTzYly8g50rs2d4doj30e80e8gm1.jpg?KID=imgbed,tva&Expires=1604485841&ssig=NeH0xwVW5J",
"profile_url": "https://m.weibo.cn/u/6404087010?uid=6404087010&luicode=10000011&lfid=1076036404087010",
"statuses_count": 2247,
"verified": true,
"verified_type": 0,
"verified_type_ext": 1,
"verified_reason": "知名萌宠博主 微博故事原创作者",
"close_blue_v": false,
"description": "ʚ♡⃛ɞ(ू•ᴗ•ू❁)欢迎来看泡芙小公举",
"gender": "f",
"mbtype": 12,
"urank": 29,
"mbrank": 6,
"follow_me": false,
"following": false,
"followers_count": 1000209,
"follow_count": 402,
"cover_image_phone": "https://wx2.sinaimg.cn/crop.0.0.640.640.640/006ZoTzYgy1ghzqqvym3aj30e80e8752.jpg",
"avatar_hd": "https://wx3.sinaimg.cn/orj480/006ZoTzYly8g50rs2d4doj30e80e8gm1.jpg",
"like": false,
"like_me": false,
"badge": {
"panda": 1,
"user_name_certificate": 1,
"super_star_2018": 1,
"wenda_v2": 1,
"dailv_2018": 1,
"suishoupai_2019": 5,
"hongrenjie_2019": 1,
"hongbao_2020": 2,
"vpick_2020": 1,
"hongrenjie_2020": 1,
"china_2020": 1
}
},
"picStatus": "0:1,1:1,2:1,3:1,4:1,5:1,6:1,7:1,8:1",
"reposts_count": 587,
"comments_count": 724,
"attitudes_count": 6003,
"pending_approval_count": 0,
"isLongText": false,
"reward_exhibition_type": 2,
"reward_scheme": "sinaweibo://reward?bid=1000293251&enter_id=1000293251&enter_type=1&oid=4497263844203901&seller=6404087010&share=18cb5613ebf3d8aadd9975c1036ab1f47&sign=f198daa7322fe7fb70e5df1472401a79",
"hide_flag": 0,
"mlevel": 0,
"topic_id": "1022:10080860c6d22143b3121b49324e3fde3358cf",
"sync_mblog": true,
"is_imported_topic": false,
"mblogtype": 2,
"more_info_type": 0,
"extern_safe": 0,
"number_display_strategy": {
"apply_scenario_flag": 3,
"display_text_min_number": 1000000,
"display_text": "100万+"
},
"enable_comment_guide": true,
"content_auth": 0,
"pic_num": 14,
"alchemy_params": {
"ug_red_envelope": false
},
"mblog_menu_new_style": 0,
"edit_config": {
"edited": false
},
"isTop": 1,
"weibo_position": 1,
"show_attitude_bar": 0,
"raw_text": "在私信里收到的投稿 \n泡芙已经被网友魔改成这样了吗 =͟͟͞͞(●⁰ꈊ⁰● |||)\n你们有见过吗[允悲]\n还有一个揣手手的找不到了[允悲][允悲][允悲] ",
"bid": "IEOhahDCR",
"pics": [{
"pid": "006ZoTzYgy1ge4wf88lyoj306o06owfd",
"url": "https://wx3.sinaimg.cn/orj360/006ZoTzYgy1ge4wf88lyoj306o06owfd.jpg",
"size": "orj360",
"geo": {
"width": "240",
"height": "240",
"croped": false
},
"large": {
"size": "large",
"url": "https://wx3.sinaimg.cn/large/006ZoTzYgy1ge4wf88lyoj306o06owfd.jpg",
"geo": {
"width": "240",
"height": "240",
"croped": false
}
}
}]
}
}]
}
}
可见我们的博文都在data.cards中,而图片在每个cards的pics.large中,链接就在图片的url中;
首先我们初始化一个空的list,用于存放爬虫完成的图片地址,方便后续下载;
随后,对于传入的uid,我们每隔一定时间(防止被封)请求一页的数据,并判断和寻找符合要求的图片链接放入list中;
最后爬虫完成后,遍历list进行图片下载即可!
需要注意的有以下几点:
1.json中图片链接定位;
由上一节可知,图片链接在data.cards[i].pics.large.url中;
2.爬虫停止逻辑
微博中只能置顶单个推文,而除了第一条推文之外,其他的推文一定是按时间降序排列的;
所以对于日期范围下载,我们只需要判断当前页的最后一个cards的日期小于规定的startTime就可以停止了!
3.日期处理
博客中的日期在mblog.create_at字段中,但是不是标准的YYYY-MM-DD hh:mm:ss的格式,而是包括了:秒前、分钟前、小时前、昨天等说明,所以我们还要将这些时间统一处理转换;
由于是一个小的工具软件,在这里我就没有对文件进行拆分:基本上所有的逻辑都在background.js中了!
下面是代码:
background.js
'use strict'

/* global __static */
import {app, protocol, BrowserWindow, ipcMain, dialog} from 'electron'
import {createProtocol} from 'vue-cli-plugin-electron-builder/lib'
import installExtension, {VUEJS_DEVTOOLS} from 'electron-devtools-installer'
import request from 'request'
import util from 'util'
import path from 'path'
import fs from 'fs'
import {formatDate} from "element-ui/src/utils/date-util";

const getPromise = util.promisify(request.get);
const isDevelopment = process.env.NODE_ENV !== 'production'

// Scheme must be registered before the app is ready
protocol.registerSchemesAsPrivileged([
    {scheme: 'app', privileges: {secure: true, standard: true}}
])

let mainList = []

async function createWindow() {
    // Create the browser window.
    const win = new BrowserWindow({
        width: 450,
        height: 650,
        webPreferences: {
            nodeIntegration: true
        },
        icon: path.join(__static, 'favicon.ico')
    })

    if (process.env.WEBPACK_DEV_SERVER_URL) {
        // Load the url of the dev server if in development mode
        await win.loadURL(process.env.WEBPACK_DEV_SERVER_URL)
        if (!process.env.IS_TEST) win.webContents.openDevTools()
    } else {
        createProtocol('app')
        // Load the index.html when not in development
        win.loadURL('app://./index.html')
    }

    await regCrawlList();
}

function regCrawlList() {
    ipcMain.on('crawl-list', async (e, userId, startDate, endDate) => {
        // re-init list
        mainList = []
        // crawl-index
        let pageIndex = 1;
        // 防封,分析一次页面休息+1S
        const interval = 1000;

        // 获取全部url
        while (await getAllImageUrl(userId, startDate, endDate, pageIndex, e.sender) > 0) {
            console.log('分析微博:' + pageIndex);
            pageIndex++;
            await sleep(interval);
        }

        // 获取完毕,触发下载
        handleList(mainList, e.sender)
    })
}

async function getAllImageUrl(userId, startDate, endDate, page, sender) {
    let url = "https://m.weibo.cn/api/container/getIndex?count=25&page=" + page + "&containerid=" + userIdToContainerId(userId);

    let cards = [];
    let lastCreateAt = new Date();
    await getPromise(url).then((value) => {
        console.log(value.body)
        let jsonObj = JSON.parse(value.body);
        cards = jsonObj.data.cards;
        for (let i = 0; i < cards.length; i++) {
            let mblog = cards[i].mblog;
            if (mblog != null) {
                lastCreateAt = mblog.created_at.toString()
                lastCreateAt = getDate(transWeiboDateStrToTimeStamp(lastCreateAt))
                if (!checkDate(lastCreateAt, startDate, endDate)) {
                    console.log(lastCreateAt, startDate, endDate)
                    continue;
                }
                let pics = mblog.pics;
                if (pics != null) {
                    for (let j = 0; j < pics.length; j++) {
                        let large = pics[j].large;
                        if (large != null) {
                            let iUrl = large.url
                            mainList.push({
                                "url": iUrl,
                                "date": formatDate(lastCreateAt),
                            })
                        }
                    }
                }
            }
        }
        sender.send('crawl-list-add', page, mainList.length)
    })

    // 如果最后一个微博已经小于开始,可直接退出;
    return cards.length === 0 ? 0 : (lastCreateAt.getTime() >= startDate.getTime());
}

function handleList(urlList, sender) {
    // 去重
    urlList = Array.from(new Set(urlList))

    // 空数组直接取消下载
    if (urlList.length === 0) {
        sender.send('crawl-download-canceled')
    }

    dialog
        .showOpenDialog({properties: ['openFile', 'openDirectory', 'multiSelections']})
        .then(async res => {
            if (res.canceled) {
                sender.send('crawl-download-canceled')
            }

            let savePathPrefix = res.filePaths[0]
            if (savePathPrefix == null || savePathPrefix === "") {
                return
            }
            for (let i = 0; i < urlList.length; i++) {
                let imgPath = path.join(savePathPrefix, (i + 1) + '_' + urlList[i].date + getSuffix(urlList[i].url));
                await sleep(1000)
                downloadAndSave(urlList[i].url, imgPath, sender)
            }
        })
}

function checkDate(checkDate, startDate, endDate) {
    return checkDate.getTime() >= startDate.getTime() && checkDate.getTime() <= endDate.getTime();
}

function getDate(dateTimestamp) {
    return new Date(dateTimestamp);
}

function transWeiboDateStrToTimeStamp(weiboDateStr) {
    console.log("translate before: " + weiboDateStr)
    if (weiboDateStr == null || "" === weiboDateStr) {
        return 0;
    }
    if (weiboDateStr.search("秒前") >= 0) {
        weiboDateStr = weiboDateStr.replace("秒前", "");
        let second = parseInt(weiboDateStr);
        return new Date().getTime() - second * 1000;
    }
    if (weiboDateStr.search("分钟前") >= 0) {
        weiboDateStr = weiboDateStr.replace("分钟前", "");
        let minite = parseInt(weiboDateStr);
        return new Date().getTime() - minite * 1000 * 60;
    }
    if (weiboDateStr.search("小时前") >= 0) {
        weiboDateStr = weiboDateStr.replace("小时前", "");
        let hours = parseInt(weiboDateStr);
        return new Date().getTime() - hours * 1000 * 3600;
    }
    if (weiboDateStr.search("昨天") >= 0) {
        return new Date().getTime() - 1000 * 60 * 60 * 24
    }
    if (weiboDateStr.search('-') >= 0) {
        if (!weiboDateStr.startsWith("20")) {
            let year = new Date().getFullYear();
            weiboDateStr = year + "-" + weiboDateStr;
        }
        try {
            return parseDate(weiboDateStr).getTime();
        } catch (e) {
            return 0;
        }
    }
    return 0;
}

function parseDate(input, format) {
    format = format || 'yyyy-mm-dd'; // default format
    let parts = input.match(/(\d+)/g),
        i = 0, fmt = {};
    // extract date-part indexes from the format
    format.replace(/(yyyy|dd|mm)/g, function (part) {
        fmt[part] = i++;
    });

    return new Date(parts[fmt['yyyy']], parts[fmt['mm']] - 1, parts[fmt['dd']]);
}

function getSuffix(iUrl) {
    if (!iUrl.substring(iUrl.lastIndexOf("/")).includes(".")) {
        return ".jpg";
    }
    try {
        return iUrl.substring(iUrl.lastIndexOf("."));
    } catch (e) {
        // default
        console.error(e)
    }
    return ".jpg";
}

function downloadAndSave(fileUrl, targetSavePath, sender) {
    let out = fs.createWriteStream(targetSavePath);
    request({
        method: 'GET', uri: fileUrl
    }).on('end', function () {
        sender.send('crawl-download', fileUrl)
    }).pipe(out);
}

function userIdToContainerId(userId) {
    if (userId === null) {
        return "0";
    }
    return "107603" + userId;
}

function sleep(ms) {
    return new Promise(resolve => setTimeout(resolve, ms))
}

// Quit when all windows are closed.
app.on('window-all-closed', () => {
    // On macOS it is common for applications and their menu bar
    // to stay active until the user quits explicitly with Cmd + Q
    if (process.platform !== 'darwin') {
        app.quit()
    }
})

app.on('activate', () => {
    // On macOS it's common to re-create a window in the app when the
    // dock icon is clicked and there are no other windows open.
    if (BrowserWindow.getAllWindows().length === 0) createWindow()
})

// This method will be called when Electron has finished
// initialization and is ready to create browser windows.
// Some APIs can only be used after this event occurs.
app.on('ready', async () => {
    if (isDevelopment && !process.env.IS_TEST) {
        // Install Vue Devtools
        try {
            await installExtension(VUEJS_DEVTOOLS)
        } catch (e) {
            console.error('Vue Devtools failed to install:', e.toString())
        }
    }
    createWindow()
})

// Exit cleanly on request from parent process in development mode.
if (isDevelopment) {
    if (process.platform === 'win32') {
        process.on('message', (data) => {
            if (data === 'graceful-exit') {
                app.quit()
            }
        })
    } else {
        process.on('SIGTERM', () => {
            app.quit()
        })
    }
}
首先,主进程中的mainList就是用来存放,爬虫后图片的链接的;
随后createWindow创建了一个窗口,并声明了窗口大小、icon等内容,在最后通过调用regCrawlList函数注册了一个crawl-list事件;
在regCrawlList函数中,我们给ipcMain注册了一个crawl-list事件:该事件接受渲染进程中按钮点击触发的事件,并接收渲染进程中传送来的userId, startDate, endDate,调用getAllImageUrl执行爬虫逻辑;
在getAllImageUrl中,我们使用了一些辅助函数完成了在第二步中讲述的爬虫逻辑;同时,每当加入一页的图片链接,我们的主进程调用send方法,触发crawl-list-add事件,向渲染进程报告当前爬虫的页数,以及已经爬取到的图片数量;
爬虫完成后,在regCrawlList函数的最后调用handleList,触发下载事件;
在handleList中,首先进行了链接去重,随后使用dialog.showOpenDialog({properties: ['openFile', 'openDirectory', 'multiSelections']})打开了一个保存文件对话框;然后,计算每个文件的保存路径,并使用node中的fs和request进行下载并保存;并且每完成一个下载任务,会触发crawl-download事件,通知渲染进程进行进度条的渲染;
渲染端就是典型的Vue项目以及通过ipcRenderer处理的一些事件;
下面是三个渲染端涉及到的文件:
main.js
import Vue from 'vue'
import ElementUI from 'element-ui';
import 'element-ui/lib/theme-chalk/index.css';
import App from './App.vue'

Vue.use(ElementUI);

Vue.config.productionTip = false

new Vue({
    render: function (h) {
        return h(App)
    },
}).$mount('#app')
App.vue
<template>
    <div id="app">
        <img alt="Vue logo" src="./assets/logo.png">
        <Crawler/>
    </div>
</template>

<script>
    import Crawler from './components/Crawler.vue'

    export default {
        name: 'App',
        components: {
            Crawler
        }
    }
</script>

<style>
    #app {
        font-family: Avenir, Helvetica, Arial, sans-serif;
        -webkit-font-smoothing: antialiased;
        -moz-osx-font-smoothing: grayscale;
        text-align: center;
        color: #2c3e50;
        margin-top: 60px;
    }
</style>
Crawler.vue
<template>
  <div id="container">
    <el-form ref="form" :model="form" label-width="80px">
      <el-form-item label="用户Id">
        <el-input v-model="form.userId"
                  placeholder="请输入Id"
                  style="width: 95%"
                  clearable>
        </el-input>
      </el-form-item>
      <el-form-item label="发表时间">
        <el-col :span="11">
          <el-date-picker type="date" placeholder="开始日期" v-model="form.date1"
                          style="width: 100%;"></el-date-picker>
        </el-col>
        <el-col class="line" :span="2">-</el-col>
        <el-col :span="11">
          <el-date-picker type="date" placeholder="结束日期" v-model="form.date2"
                          style="width: 100%;"></el-date-picker>
        </el-col>
      </el-form-item>
      <el-form-item>
        <el-button id="submitBtn" type="primary" @click="onSubmit" :disabled="btnDisabledStatus">立即下载</el-button>
      </el-form-item>
    </el-form>

    <div id="crawl-list" v-if="showCrawlList">
      <span v-text="crawlListText"></span>
    </div>
    <div id="process-bar" v-if="showProcessBar">
      <el-progress
          :text-inside="true"
          :percentage="$data.downloadPercent"
          :stroke-width="22"
          :color="processBarColor"
      ></el-progress>
    </div>
  </div>
</template>

<style scoped>
#container {
  margin-top: 20px;
}

#submitBtn {
  margin-left: -80px;
}

#process-bar {
  width: 85%;
  margin-left: 42px;
  margin-top: 15px;
}

</style>

<script>
const {ipcRenderer} = window.require('electron')

export default {
  name: 'Crawler',
  data() {
    return {
      form: {
        userId: '',
        date1: '',
        date2: ''
      },
      crawlListLength: 0,
      downloaded: 0,
      downloadPercent: 0,
      showCrawlList: false,
      btnDisabledStatus: false,
      showProcessBar: false,
      processBarColor: '#5cb87a',
      crawlListText: ''
    }
  },
  mounted: function () {
    this.listenAddCrawlList();
    this.listenDownloadList();
    this.listenDownloadCanceled();
  },
  methods: {
    onSubmit() {
      this.downloaded = 0;
      console.log(this.form.userId)
      ipcRenderer.send('crawl-list', this.form.userId, this.form.date1, this.form.date2)
      if (!this.showCrawlList) {
        this.showCrawlList = true
      }
      if (!this.btnDisabledStatus) {
        this.btnDisabledStatus = true;
      }
    },
    listenAddCrawlList() {
      let that = this
      ipcRenderer.on('crawl-list-add', function (e, pageIndex, mainListLength) {
        that.crawlListLength = mainListLength;
        that.crawlListText = '目前扫描' + pageIndex + "页,预计下载图片" + mainListLength + "张!"
      })
    },
    listenDownloadList() {
      let that = this
      that.downloaded = 0
      ipcRenderer.on('crawl-download', function () {
        if (!that.showProcessBar) {
          that.showProcessBar = true
        }
        that.downloaded++;
        that.downloadPercent = Number((that.downloaded / that.crawlListLength * 100).toFixed(2))

        // 下载完成
        console.log(that.downloaded, that.crawlListLength)

        if (that.downloaded === that.crawlListLength) {
          that.btnDisabledStatus = false;
          that.downloaded = 0;
          that.crawlListText = '下载已完成';
        }
      })
    },
    listenDownloadCanceled() {
      let that = this
      ipcRenderer.on('crawl-download-canceled', function () {
        that.btnDisabledStatus = false;
        that.downloaded = 0;
      })
    }
  },
};
</script>
main.js和App.vue就是通常的Vue项目,几乎无改动,下面我们重点看Crawler.vue;
在template中我们定义了:
在这个组件中,我们定义了几个参数:
在mounted中我们触发了三个函数:
分别监听了crawl-list-add、crawl-download以及crawl-download-canceled事件;
最后的onSubmit函数触发了主进程中的crawl-list事件,开始爬虫;
至此,主进程和渲染进程都开发完毕;
在开发时就可以使用npm run electron:serve进行热部署开发;
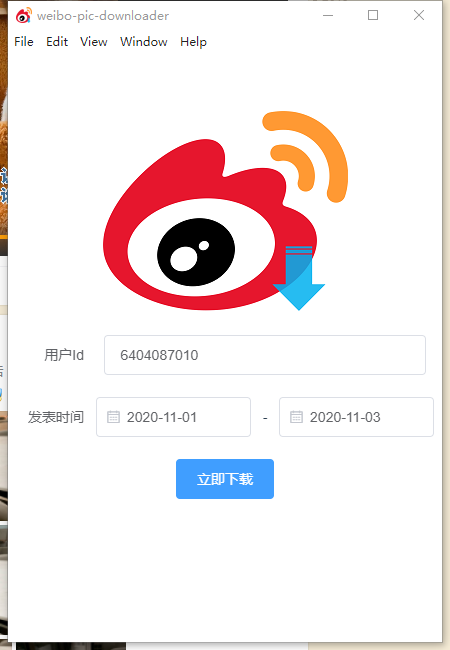
我们在软件中填入userId,并选择时间日期,最后点击“立即下载”;
稍等片刻,爬虫完成后,会弹出保存窗口,选择下载目录后即可开始下载:
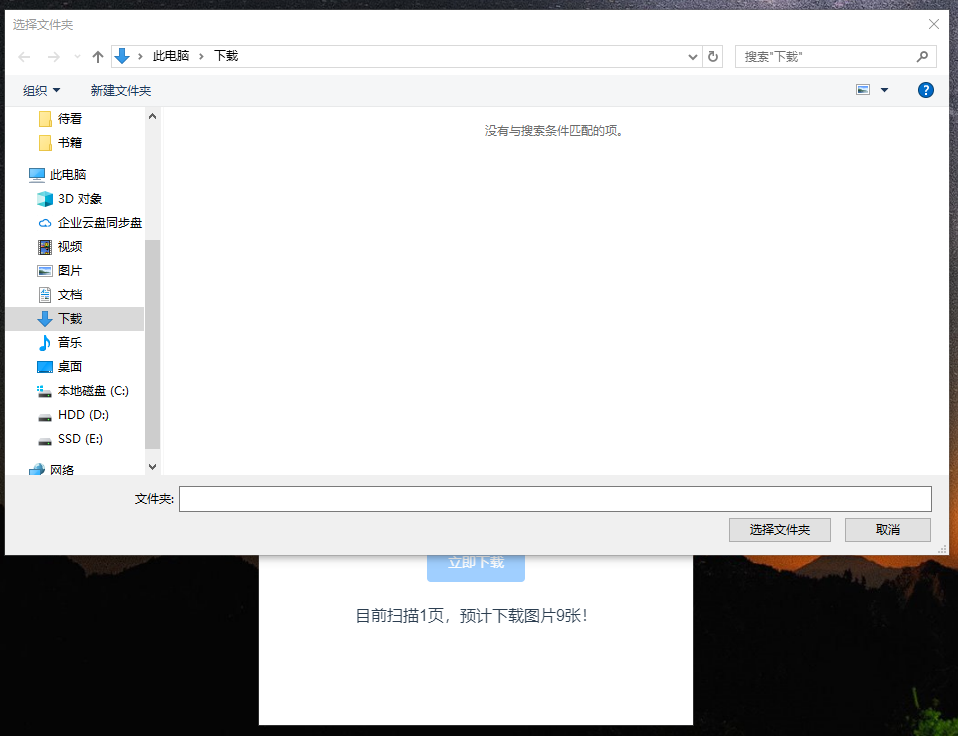
开始下载:
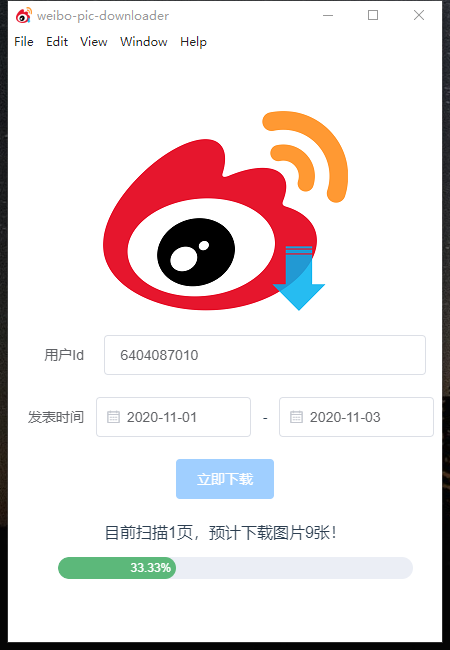
完成下载:
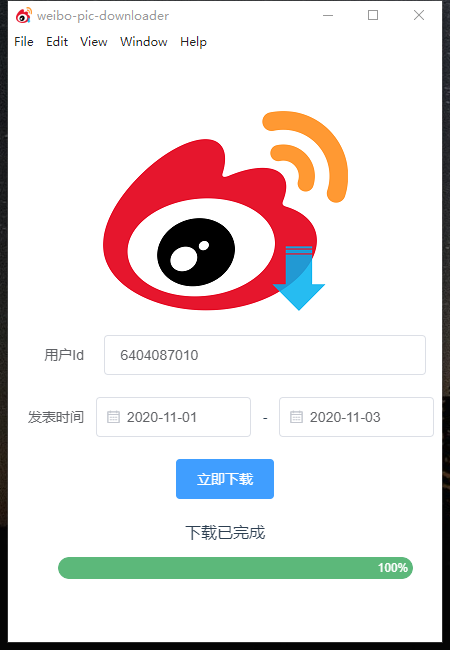
最后即可在你选择的目录找的下载的图片啦!
<br/>
本项目使用了vue-cli-plugin-electron-builder进行打包;
使用起来也非常简单:
npm run electron:build -- --win nsisnpm run electron:build -- --macnpm run electron:build -- --linux debVue CLI Plugin Electron Builder官方文档:
其他使用方法可见上方文档;
由于Electron的Linux和Mac的编译地址down掉,目前还没有恢复!
所以mac和linux上述命令会报错,类似于:
  • cannot get, wait error=Get https://service.electron.build/find-build-agent?no-cache=1f42oro: dial tcp 51.15.76.176:443: connectex: A connection attempt failed because the connected party did not properly respond after a period of time, or established connection failed because connected host has failed to respond.
  attempt=0
  waitTime=2
  • cannot get, wait error=Get https://service.electron.build/find-build-agent?no-cache=1f42oro: dial tcp 51.15.76.176:443: connectex: A connection attempt failed because the connected party did not properly respond after a period of time, or established connection failed because connected host has failed to respond.
  attempt=1
  waitTime=4
  ……
  ⨯ Get https://service.electron.build/find-build-agent?no-cache=1f42oro: dial tcp 51.15.76.176:443: connectex: A connection attempt failed because the connected party did not properly respond after a
  period of time, or established connection failed because connected host has failed to respond.
  ⨯ C:\Users\mcw\AppData\Roaming\npm\node_modules\electron-builder\node_modules\app-builder-bin\win\x64\app-builder.exe exited with code ERR_ELECTRON_BUILDER_CANNOT_EXECUTE stackTrace=..
见下面的issue:
<br/>
由于我主要是做后端开发相关的工作,前端并不是我的强项(最多也就是用js写一下node),所以有些功能可能实现的并不是很好,但是基本的需求已经完全满足了;
源代码:
有兴趣的可以去看看,给个star~
<br/>